
The picture frame moulding in the dining room is finished! I can’t even tell you how I excited I am because the installed moulding has completely transformed the dining room. It took a complete 7 weeks for the dining room to get to this stage, so let’s celebrate!
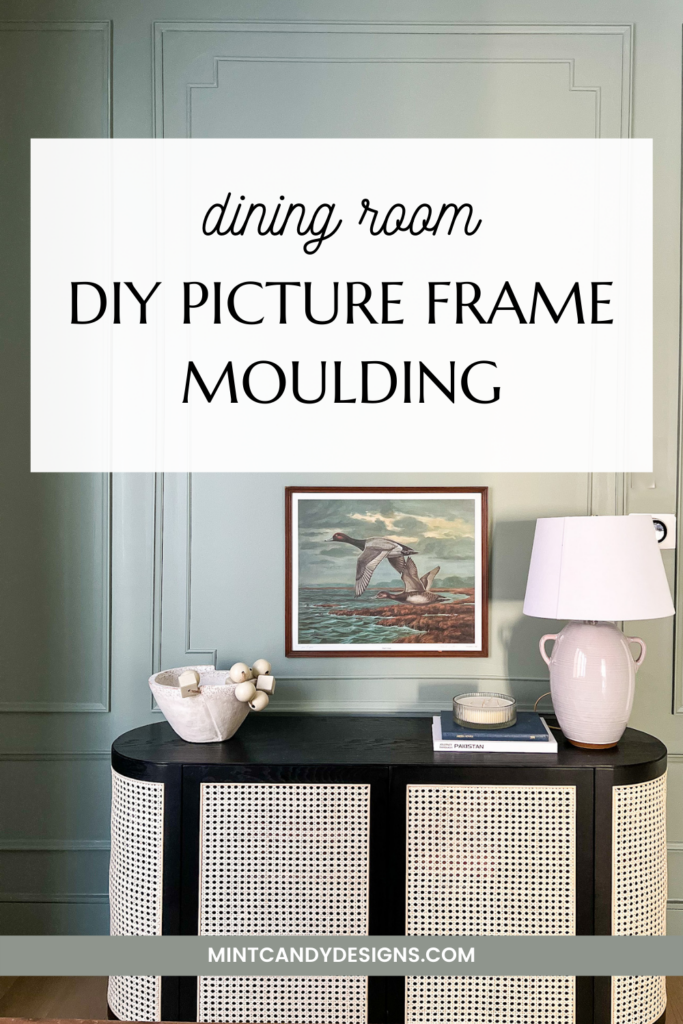
If you have been around this blog or Instagram, you know I love transforming a room with accent walls (see examples here, here, and here). After we moved into our new home this past September, I knew I had to use accent walls again. In this new home, I wanted a traditional yet modern feel and there is no better design element than picture frame moulding to add that. The first room I have started with is the dining room as it is the first space that you see when you enter our home. Adding picture frame moulding has completely transformed the look of this builder grade drab dining room.
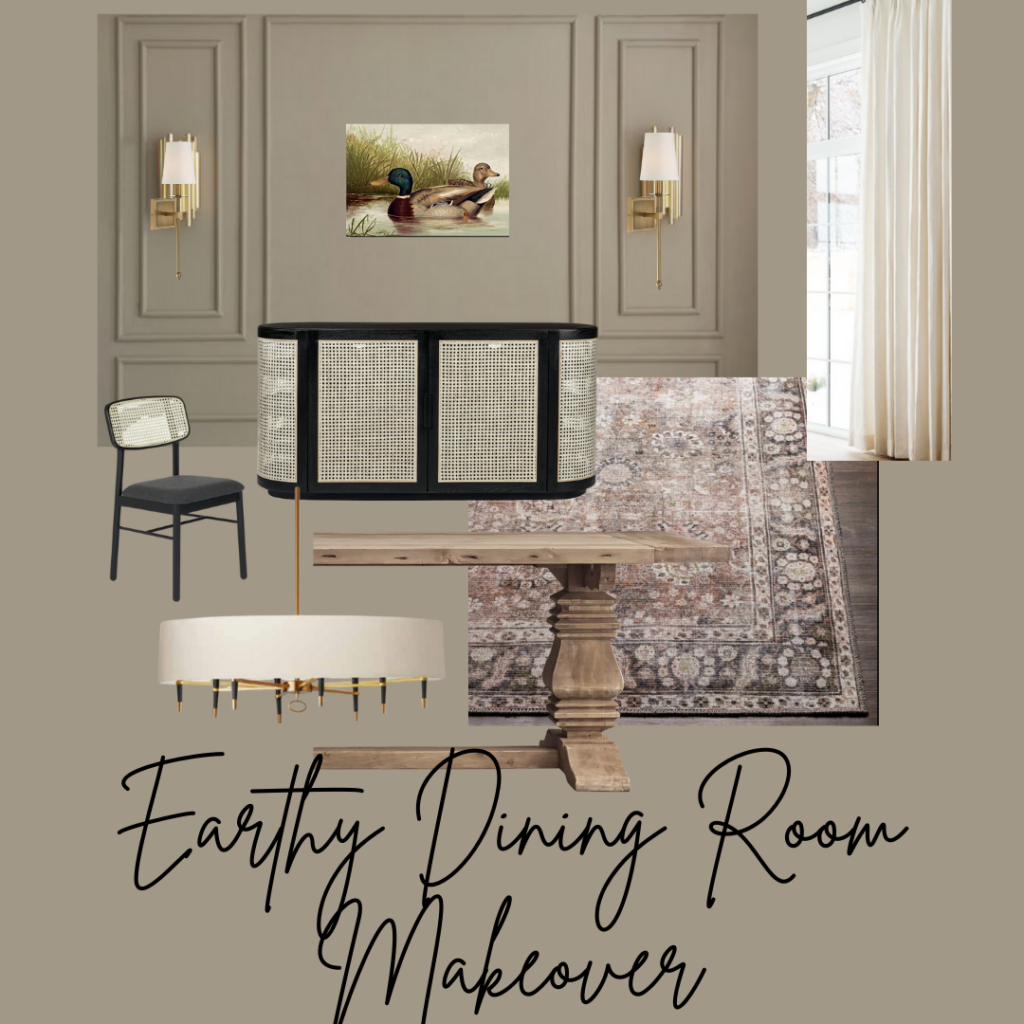
Below is the moodboard to refresh your memory and the blog post if you would like to read through it
Planning the Picture Frame Moulding Install
The first step in installing picture frame moulding in any space is to plan the moulding layout. We started with measuring each wall that the moulding was to be installed on and the location of each outlet. This is a key step in helping you plan the width and height of each box to ensure you do not have to had odd cuts – or if you do that you account for them. We use our trusted Bosch Laser Distance Measure to measure each wall. I love using this measure for the moulding wall because it is very precise which allows for accurate cuts and less wastage when using expensive trim materials.
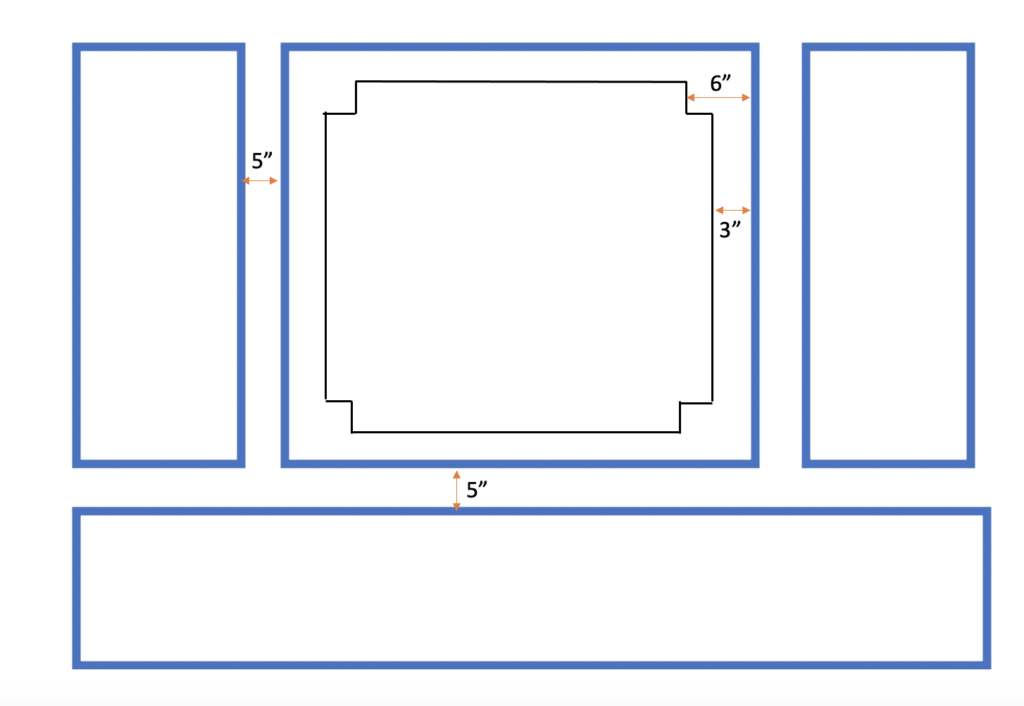
Once you have your measurements, it is time to pick a design. Traditional picture frame moulding in a dining room typically has top and bottom boxes with a chair rail in the middle. I wanted to do something different and so I opted to create three vertical boxes with a wider middle box flanked on either side by thinner boxes. You can choose to do three equal width boxes or any number you like. However, I highly recommend choosing an odd number to ensure that the design is appealing to the eye. Odd numbers like 3,5 and 7 are more appealing in designing any accent wall including a picture frame moulding wall.
Once I had decided on the overall gist, I drew out the design on my handy Remarkable tablet. I find that drawing out a design especially in a new project like this moulding wall really useful. I am a visual person and needed to see the picture frame moulding drawn out. This is where I decided to add another design element to elevate the traditional picture frame moulding. I added art deco boxes to the interior. I have seen these boxes more recently in my friend Cait’s daughters nursery and wanted to implement them here.
Figuring out measurements for your Picture Frame Moulding Wall
Once you have your picture frame moulding layout established, it is time to determine the spacing and measurement. There are a few key measurements that you need to nail down once you have decided the number of boxes.
First, what will be the space between the edges of the wall and the boxes AND between the boxes. I recommend using an odd number here again particularly 3 or 5 inches (fibonacci numbers that are more appealing visually to the brain – yes I am a nerd!). I chose 5 inches as my number. Once you have this figured out, you can do some simple math to calculate the width of your boxes.
If you are adding interior art deco boxes, you will need to figure out what the spacing there needs to be from the edges of the outer box. I recommend doing this step after you have installed the outer picture frame moulding boxes. This will allow you to keep in mind the thickness of the trim you have used on the outer boxes.
I used a distance of 3 inches between the inner edge of the outer box trim and the outer edge of the inner box trim.
Here is a rudimentary diagram for your reference
Selecting Trim for your Picture Frame Moulding
If there was ever a question in my inbox, it was “what kind of trim did you use for the picture frame moulding?!!?”
Well, here is the answer.
I partnered with Metrie Trim for this project and using their extensive catalogue, I chose these two trims:
How to Purchase the Right Amount of Moulding
To figure out how many pieces of trim to buy, add all the lengths in inches and convert them to feet. Then divide that number by 8 if your trim is available in 8 ft lengths. Then, add 20% of that number for wastage, because if you are like me, you will make mistakes and need extra pieces of trim.
I used 25 pieces of 8 ft length trim for the outer boxes and 6 pieces of moulding for the inner boxes.
Cutting and Installing Picture Frame Moulding
To cut and install picture frame moulding, I recommend a few beginner basic DIY tools.
You will need:
- A Miter Saw – I use this one and love it
- A Brad Nailer – We have the Ryobi airstrike nailer and it is a great beginner DIY tool
- Brad Nails – I used 1.5 inch thick brad nails
- Pencil to mark cuts
- Miter Shears if you would like to cut finer trim
- Level
- Measuring tape
- Ear and Eye protection – really important!!
- Caulking + Caulk Gun + Baby Wipes
First, you will measure out each piece of trim. A great way to avoid re measuring pieces of trim when you have to cut the same length multiple times is to use a stop block on your miter saw. This beginner miter saw tutorial covers this. You can use this handy trick to avoid making minor measurement mistakes and having tight mitered corners.
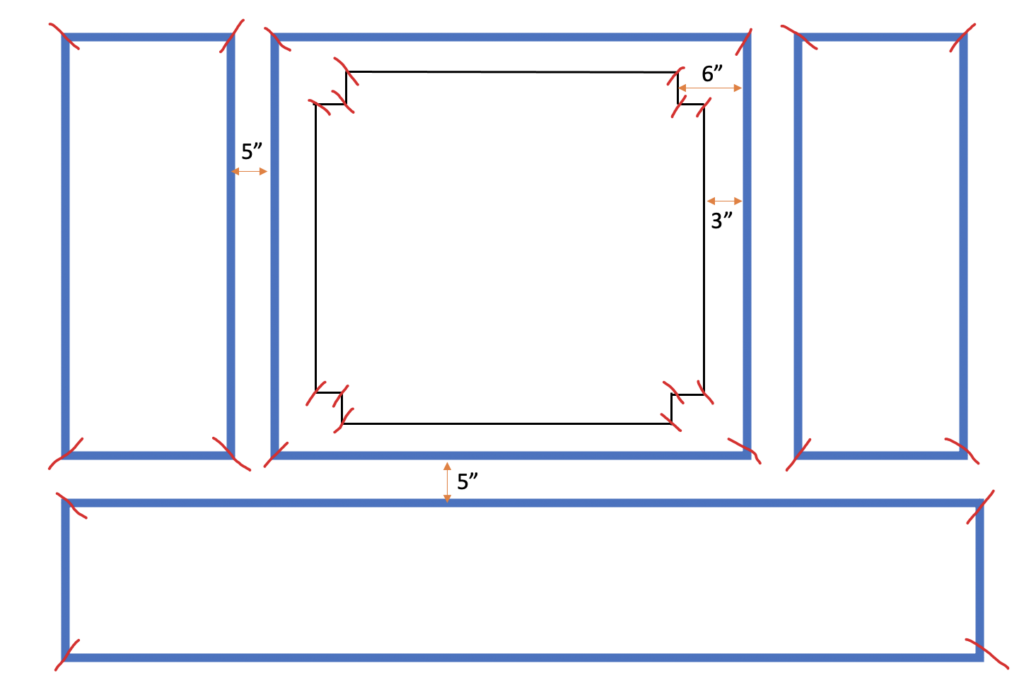
When installing picture frame moulding or any moulding, you will be created the boxes with a 45 degree corner cut. This allows for the pieces to fit together like a puzzle. If you are doing this for the first time. I recommend watching this tutorial on how to cut miter cuts. The most important part is figuring out the direction of your cuts and how many pieces need that. Below is my diagram for how I figured out the direction of the miter cuts. The red lines are the direction of the cut at 45 degrees. Since my interior trim was very fine, I used a handy miter shears to cut the pieces.
Once you have all your cuts, It is time to install. I highly recommend cutting a scrap piece of wood to the length of your distances between boxes i.e. for me, 3 and 5 inche pieces. These are spacer pieces and rather than measuring the distance every single time, I simply slid the spacer piece between the pieces and used a level to ensure the pieces were straight before nailing the boards in.

After nailing the pieces of moulding in, you will need to caulk the seam where the trim meets the wall. This elevates any DIY project from beginner to professional! Wipe off excess caulk with a baby wipe for some instant magic! Here is a beginner video to help you if this is your first time caulking moulding work.
Next you can fill the nail holes and mitered corners with wood filler and sand it for a finished look. Or you can take a shortcut like me and use the caulk to fill these holes in.
After that, it is time for paint! I used Heather Gray by Benjamin Moore in an eggshell finish for the walls and picture frame moulding here. The baseboards are painted the same colour in a semi gloss trim.
I recommend painting your wall BEFORE installing the trim. This is because you will be able to easily roll on paint versus having to switch between a brush and a roller if you paint after the trim is installed. An alternative is to install the trim, then tape off everything in plastic and use a paint sprayer. However, once you have sprayed a surface with paint, if you ever do any touch ups with a brush they are more apparent and often require a repainting of the whole wall.
If you are choosing to paint the wall before installing the trim, use a good quality brush like this Wooster short angled brush to paint over the trim.

And that is how I installed picture frame moulding in the dining room! Next, sconces and some art!

Looks amazing, thanks for sharing.
Thanks for reading!
This is such a great guide and I love the room colour!
Thank you!!
Looks beautiful, great job
thanks for sharing the tips 🙂
Thank you!!
Hi Areeba,
This is so beautiful!
Do you use trim paint to paint the trims or can I use wall paint (same color as the wall) to paint trims?
Thank you in advance!