
Oh hey there! Hope you are having a wonderful day! I am FINALLY getting around to writing this blog post about the DIY Sponge Wall Powder Room Makeover t that took it from builder grade to fancy in just an evening! Now, I love the look of some gorgeous wallpaper in a bathroom but I don’t love the price tag attached to wallpapers and also the work that goes into installing them especially in a small crammed space like a powder room!
So, I decided to improvise and used some fancy tools. Guess what fancy tools I used?
PAINT and a sponge!! I was inspired by my friend Rachel at The Clover Home and her bathroom sponge wall for this DIY. This technique of using a regular dish sponge and leftover paint not only gives you a budget makeover, but gives you the high end look of wallpaper but with a DIY twist and some dish sponges. This gives you that DIY Sponge Wall with the look of a bespoke custom wallpaper without the price tag!
All you need is a CLEAN, brand new dish sponge, leftover paint from another project or a small sample of paint, and a paper plate to get the look of wallpaper with this DIY sponge wall!
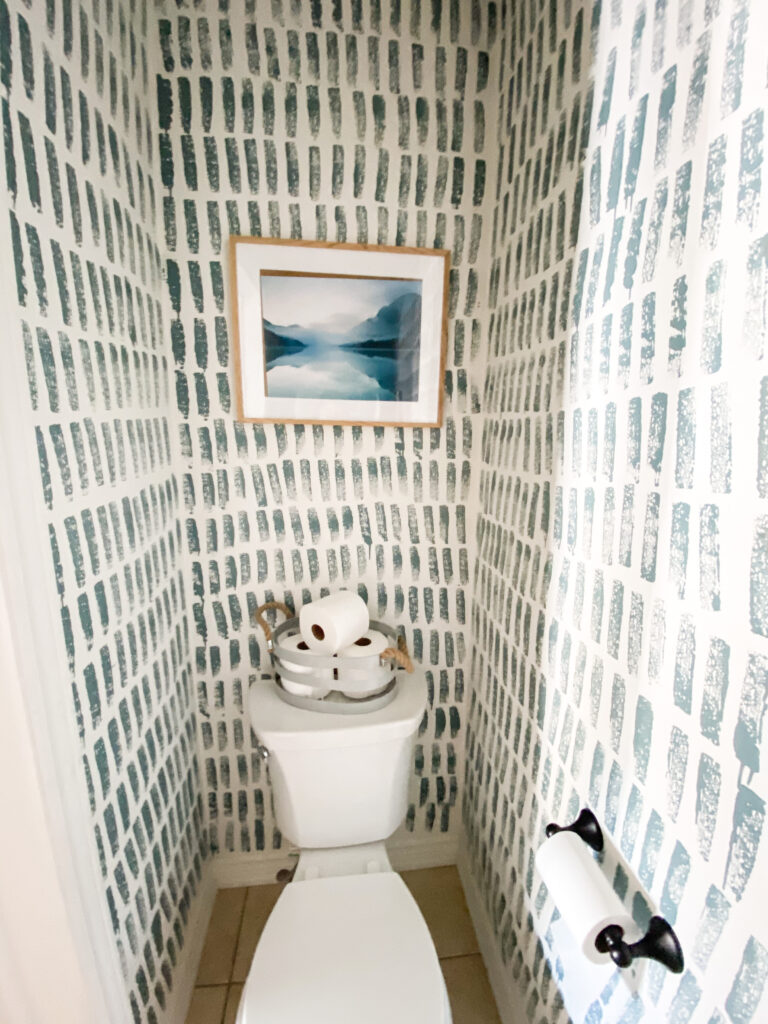
First, I ensured that the long side of the sponge was straight and used a scissors to cut it straight. Next, I dipped it into paint and got to work. I worked horizontally from the line of the ceiling and stamped using the sponge 4-5 times before re dipping the sponge into the paint. Because I was going for a custom hand-made wallpaper look (read: there is some for imperfections), I did not care about having perfectly straight lines for this sponge wall. If you do care about that, I would recommend using a laser level to help guide you. But just like in a hand printed wallpaper pattern there will be imperfections, this wall also has them and in my opinion it simply adds to the character of the DIY sponge wall!

Some other questions I have received about this DIY sponge wall powder room makeover
How long did it take to complete the DIY Sponge Wall?
This project took me 1.5 hours to execute to this DIY sponge wall. Once you get started on the sponge wall, it goes by pretty fast! I recommend working one row at a time and putting on a good spotify playlist to get you through!
What size was the dish sponge for the DIY Sponge Wall?
The dish sponge I used was approximately 4/-5 inches long (Scotch Brite brand)
Did you use more than one dish sponge for the DIY?
I did not – but if you find that your sponge is getting loaded with paint as a sponge will absorb more and more paint over time, I would recommend using another one to ensure your pattern looks nice
What kind of paint did you use on the sponge?
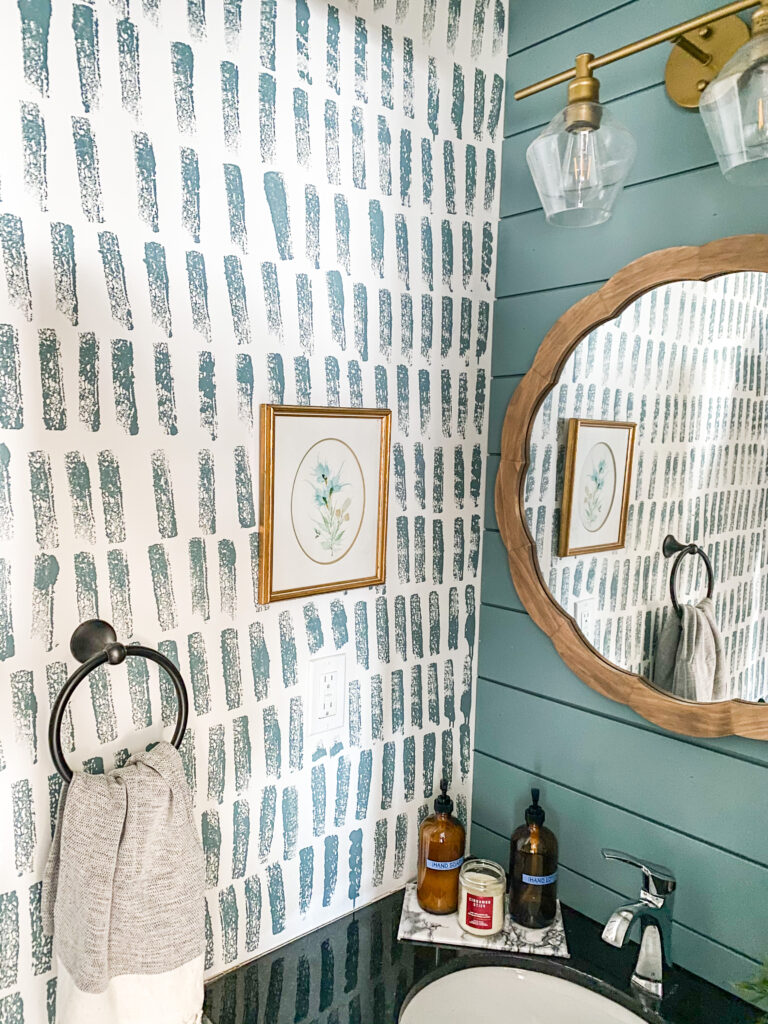
I used regular wall paint that was leftover from another room makeover for this DIY sponge wall. This particular colour is Benjamin Moores Aegean Teal.
If you have more questions about the powder room, please leave them in the comments and I am happy to answer!

Other Sources for the Powder Room Makeover
Prints: Vintage & from the Poster Store
Rug: Revival Rugs one of a kind – use code MINTCANDY10 for 10% off any order
Accessories: Towel Ring, Toilet Paper Holder, Lighting, Hand Towel, Amber Bottles for soap and hand lotion
PIN THIS POST FOR LATER


While I love the sponge painting, I would like to know more about the shiplap behind the mirror. I’m in the process of re doing my bathroom and would love shiplap behind our mirrors – but all the shiplap I have found at Lowe’s or homedepot is really thick . Where did you get yours ? And what color is it?
Thank you
I got it from Metrie and it’s available at Lowe’s! It’s the pre painted version 🙂 it’s very easy to paint and install and I’d recommend painting it before cutting and installing.
What color is the shiplap? I love it!